Showing posts with label glitter. Show all posts

Sunday, October 5, 2014

Nail Art with Shimmer Polish in Jennifer & Color Club Cherubic

***press sample***

I recently tried my hand at a little bit of nail art. Those of you who do this well make it look easy. I found it to be nothing of the sort!

Glitter toppers lend themselves perfectly to extending a manicure from either regrowth at the cuticle or to use as tip wear camouflage as I did long ago HERE with Wendy that consists of purple, copper & multicolored various sized glitter.

Let me just show you a quick picture of one of my favorite Shimmer Polish colors - Jacki - which contains fine glitter in violet, navy & maroon. Again, an early picture but quite lovely. I prefer fine glitter as it is easier for me to work with.


indoors under OttLite
 

On to the nail art. I used 2 coats of Color Club Cherubic holographic polish as a base. Then I thought I would play around with various shapes and a bit of fine nail striping tape. I hope you enjoy my first attempts at playing with polish using Shimmer Polish in Jennifer which contains soft blue, periwinkle, gold and other various colors of glitter. Just look at those amazing close up bottle shots ☼


Color Club Cherubic (indoors under OttLite)


outdoors


outdoors
 

 outdoors
 
 
outdoors
 

outdoors
 

bottle close up outdoors
 

 bottle close up outdoors
 

indoors under OttLite


To look at Jennifer directly:
Jennifer

Buy Shimmer Polish on her lovely Etsy site here:
Shimmer Polish

For her stunning line up of different blogger's pictures of all colors & endless possibilities, visit:
shimmy shimmer


***press sample***

Saturday, December 21, 2013

Urban Lacquer Glittery + Bright 2013 glitter topper, an unsurpassed beauty for all seasons!

***press sample***

Holy COW - I promised you a stellar glitter bomb and Brenda from the crazy good Urban Lacquer did not disappoint! Feast your eyes on this insane glitter:

indoor macro goodness under OttLite
 
I think this color would blow your mind with a holographic red underneath but I chose a readily available mass market brand so you too can achieve this look with little hassle.

Here are the steps I took & then on to the pictures!
1. Sally Hansen Double Duty base & top coat used for base
2. 2 coats Orly Red Flare
3. 2 coats Urban Lacquer Glittery + Bright 2013 (my absolute, hands down favorite)
4. 1 coat Gelous
5. 1 coat HKG top coat for that amazing glass shine
 
Urban Lacquer's description: "A sparkling combination of red, pink, gold, and iridescent glitter, with a smattering of light purple glitter (to keep things interesting!), in a clear base." Let me stress the IRRIDESCENT because that is what makes this polish dazzle beyond words. I'm so thrilled with this color! And IMHO, there is some holographic glitter too - look at the rainbow effect. To know me is to get me & my holo love affair ☼

 
indoors under OttLite
 
outdoors
 
outdoors
 
macro attack!
 
oh yeah, one more macro attack
 
bottle shot
 
bottle shot
 
Now hurry on over there because I can honestly say, and I've said it before, these polishes give Lynnderella a run for her money. And this one will go quickly!

Application was a breeze. No fishing for glitter, the base was thick and packed with goodies in every swipe. I have exhausted my superlatives. RUN!
 
Please take a moment to look at the other beautiful Urban Lacquer polishes reviewed on my blog on December 3rd, Chimney-Burn-with-Lit-Up Like the Tree. They are mesmerizing. I want to thank Brenda for her generosity and to let her know she is one classy dame with a creative hand at color combining ♥ Happy polishing, dolls ☼
 
 
***press sample***


Tuesday, December 3, 2013

Urban Lacquer Chimney Burn with Lit Up Like The Tree

***press sample***


Just in time for the unexpected cold snap in Arizona - from the mid to high 70's during the day to the chilling 40's overnight - I present to you, Urban Lacquer's Chimney Burn. We have already used our Kiva 4 times and plan to buy our tree next week but my fingers are already Lit Up Like The Tree. Couldn't resist the silliness.

Urban Lacquer has a beautiful winter themed collection. The first polish I applied is Chimney Burn which happens to be her first foray into a multichrome. It is a taupey grey with purple/blue/turquoise flecks/flash/shimmer. It can appear purple, orange, blue, grey or any number of colors depending upon which angle you view it at.

I applied 4 thin coats over a base coat and a ridge filler. You must be patient when applying the coats, allowing each to fully dry before applying the next coat. The polish comes alive around the 3rd coat but I needed 4. All images were taken indoors using an OttLite.

Urban Lacquer


I then decided to jazz it up with Lit Up Like The Tree - a killer glittah bomb containing stars, demilunes, circles, squares, hexes and various sizes of microglitter in gold, silver AND holographic finishes swirling around in a clear base. This polish gives Lynn a run for her money. It was so easy to apply. Nothing got caught on the sides of the bottle. Every brush stroke yielded a frenzy of glitter - perfection!

Notice how Chimney Burn really shines through the glitter topper. This is 2 applications of Lit Up Like The Tree over Chimney Burn and 1 coat of HKG top coat to smooth it all out.

Urban Lacquer


I hope you enjoy the final effect. I am now officially ready for the Holidays ☼

Urban Lacquer

***press sample***

Tuesday, November 5, 2013

1st post redux Yellow Stopper pop off Lynnderella When the Moon Was a Star glitter bomb jelly sandwich

I heard the call of the fabulous Jen at xoxojen to recreate our first ever blog post. My oh my how things have changed. I am almost exclusively into holographic finishes so to revisit glittah bombs was a hoot!

This is a pic heavy post with a step by step pictorial of how to build my favorite glitter bomb polish that POPS OFF in 2 days tops. This is great if you do not want to use the acetone, cotton square & foil method. I cannot stress to you the importance of not tugging at your nails. They will pop off on their own but you can cajole them if there is no resistance. Be careful.

So here we go:

1. Start with 2 coats of American Classics Yellow Stopper Top Coat (sallybeauty). Incidentally, this is my go to lazy day manicure. No one sees in macro mode so this looks like a French manicure without the fuss. If you want to do the quickie French mani, these are the steps so they don't pop off: base coat of your choosing, 2 coats of Yellow Stopper, one coat of favorite top coat (HKG for me). Done!


Yellow Stopper (2 coats)
 
Yellow Stopper (2 coats)

2. Base of jelly sandwich is one coat of Cirque Colors Tibetan Nights

Cirque Colors Tibetan Nights (1st coat)
 
 
Lynnderella When the Moon Was a Star
 
4. Now add another coat of Tibetan Nights
 
Cirque Colors Tibetan Nights (2nd coat)
 
5. Top it all off with the glitter friendly, depth & gloss producing best-ever top coat made by Glisten & Glow named Hong Kong Girl (or other iterations of the same product under slightly different names)
 
2 coats HKG top coat
 
Some pics of the finished product:
 
outdoors
 
outdoors
 
indoors under an OttLite
 
And now for the fun part - this sandwich will literally POP OFF in a day or two. Amazing! No clean up whatsoever.


And the old pic - no laughter allowed - well, if you must ☼ 


I hope you enjoyed the redux of the very first post I made. Check out Jen's blog for the most comprehensive list of Indie Nail Polishes. You will be gob smacked at the selection: xoxojen
 
I'd love to hear from you. And please join my blog. It's always a pleasure to meet new people and follow them in return. Happy polishing ☼

Saturday, May 18, 2013

Nerd Lacquer Cyance Friction

I have decided to add my guest post to my own blog because I haven't been keeping up with my entries and a few of my gracious followers have asked me why I haven't posted in a month or so. I am giving my nails a chance to recoup. I like to do this every few months while I pursue my other passions. Thanks so much for your kind words of encouragement and I promise to post new manis soon. I hope you are all having a great Spring/Summer ☼

Please read the previous post to see the full guest post & visit lisasnailobsession

Today's entry features Nerd Lacquer's Cyance Friction.

I am sure you have heard that the incomparable Nerd Lacquer is back in business. The shopping experience was stressful and exhilarating! All polishes in the first sale were out of stock within 3 minutes and apparently there were 900+ bottles listed and an oversell of 500+ for a total of 1400+ bottles. I think it's safe to say, Nerd Lacquer is one of the most popular indie brands on the market.

This is one of my favorite colors - Cyance Friction - which is part of her Nerd Crush series. She has many creative series and names that are all sci-fi influenced. This color is a brilliant cyan-teal with pink shimmer and turquoise and copper glitter. The color cyan may be used as a name for any color in the range between blue and green. This is a vibrant color full of POW that really comes alive in direct sunlight but is equally beautiful indoors. I photographed this manicure under different lighting conditions so you can see the glory that is Cyance Friction.

The formula glides easily, requires only two thin coats for full coverage and lasts for many days with no chipping. Although this polish is packed with glitter, it needs no top coat for smoothness. I did use Hong Kong Girl top coat for shine because the polish is a more muted finish than I prefer.

I hope you enjoy the photographs and good luck with your NL hunting ☼

NERDLACQUER

Glisten & Glow (Hong Kong Girl top coat)


Sunday, January 20, 2013

Shimmer Polish Cassandra with Fantasy Makers Confetti Glitz

Another stunner by Shimmer Polish: Cassandra

I had great difficulty picking up the color on my new camera as I have not yet deciphered how to white balance it. The pictures do not do this polish justice but the need to share outweighed the desire for reading the manual on CD, pfff. This is such a stunning combination. My nails look like icicles IRL!

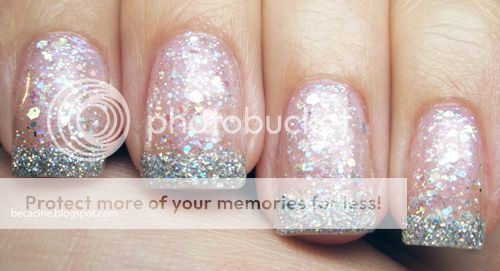
Here is the process: Yellow Stopper as a base coat for that natural French manicure effect (it casts a lavender hue on your natural nail), one coat Shimmer Polish Cassandra (pearl white holographic glitter), "French tips" using  Fantasy Makers Confetti Glitz (a super shiny fine holo powder that can be used for many purposes) and my favorite top coat, HKG.

Enjoy ☼

Shimmer Polish


Sunday, January 6, 2013

Candeo Colors Orchid

I promised you color and here it is. I have seen so many beautiful manicures with Candeo Colors Orchid, I just had to buy a bottle and give it a try. It has turned into one of my favorites.

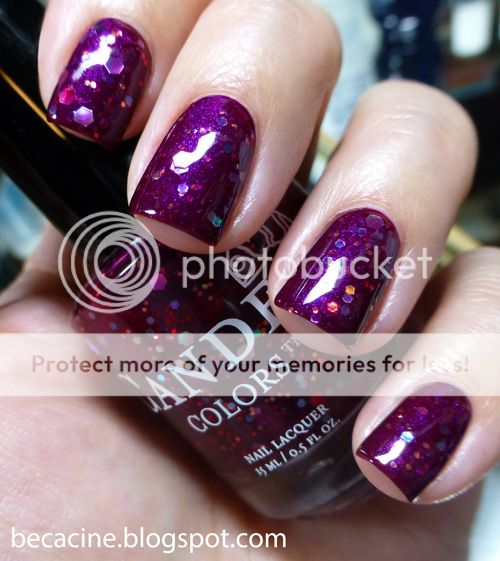
This color is stunning. It is described as a shimmery fuchsia base that is loaded with small copper, light purple, magenta and large silver holographic hex glitter. I'd like to add that it is a fuchsia jelly based polish that can be layered for more depth and sparkle. It would be great for sandwiching (next time!).

For this manicure I applied a base of 2 coats Ulta in Deep Desire, one coat of Candeo Colors Orchid and 1 coat of Hong Kong Girl top coat.

I hope you enjoy it as much as I do. Thanks for stopping by and Happy 2013 to you all ☼

Candeo Colors


Wednesday, December 5, 2012

Nubar Spark with Shimmer Polish Wendy

I recently picked up a bottle of Shimmer Polish in Wendy and thought it would make a nice easy gradient topper over Nubar Spark as the tips started to wear. This gave my mani a two day extension. You can see the regrowth at the bed of my nails but IRL, it just looked like a fun gradient (sans sponge mess).

Thanks for stopping by!

Shimmer Polish